
How It Works
When enabled, a waitlist option replaces the “Sold Out” notice on your event page. Ticket buyers can submit their details to be alerted when additional tickets become available.Waitlist Behavior with Password-Protected Tickets
The waitlist can appear once public tickets sell out, even if hidden password-protected tickets (ones that only show after the password is entered) are still available. Password-protected tickets that are visible before a password is entered still count toward availability.
- If VIP tickets are hidden until a password is entered and are still available, but all public tickets are sold out, the waitlist can still appear
- If the waitlist shows up (or doesn’t) unexpectedly, check whether each password-protected ticket is visible before the password is entered
Step-by-Step Guide to Enable Waitlists
- Log in to Your Manager Portal Go to manager.simpletix.com and sign in with your credentials.
- Navigate to Events Once logged in, click Events from the top menu.
-
Locate Your Event
- Click the search bar and type your event name.
- Locate the event from the search results and click it to open the event details.
- Access the Waitlist Section In the left-hand panel of your event page, click Waitlist.
-
Enable the Waitlist Feature
On the Waitlist page, turn on Waitlist Enable to activate waitlisting for your event. Use Automatically Email Waitlist Attendees to choose whether the system emails waitlisted people when additional tickets become available.
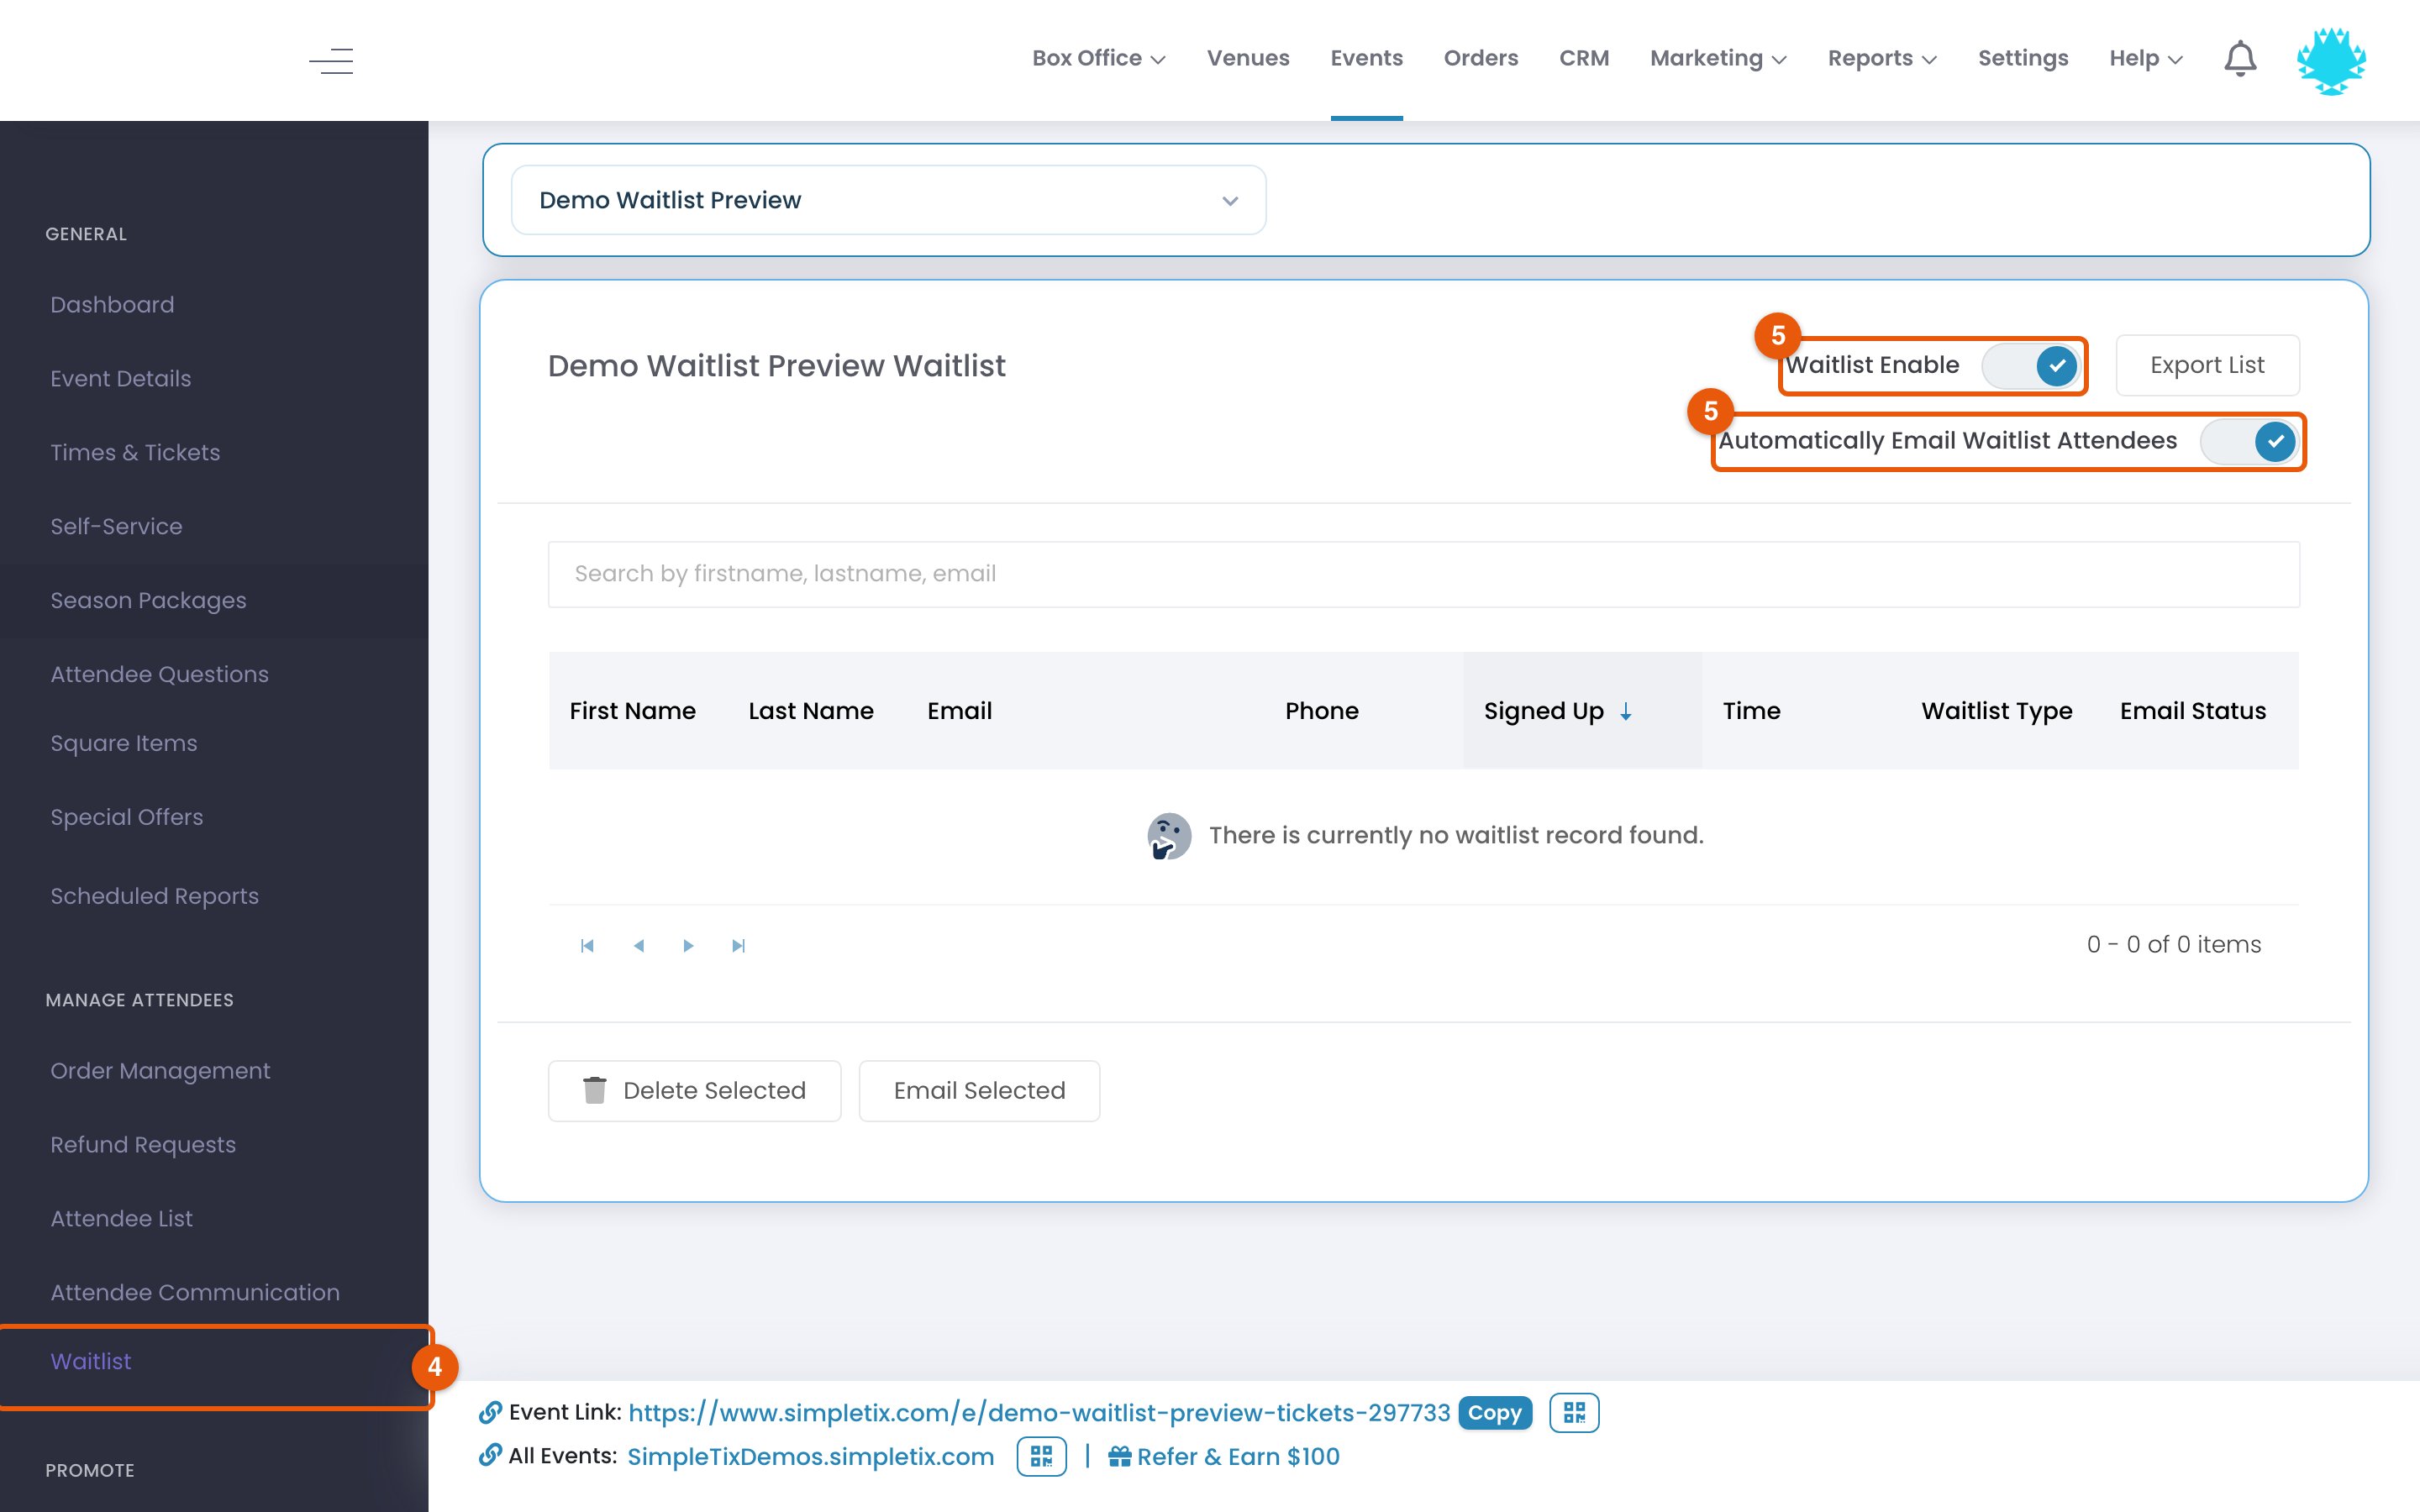
- Confirm Waitlist Activation When no more tickets are available, your event page shows a waitlist option instead of a sold-out message.
- Attendee Sign-Up Attendees can now fill in their details on the waitlist form to be notified if tickets are released.
-
Notifying Waitlist Attendees
When additional ticket slots become available:
- If the Automatically Email Waitlist Attendees setting is on, customers receive an email notification automatically.
- If the setting is off, you can manually select attendees from the waitlist and click Email Selected to notify them.